|
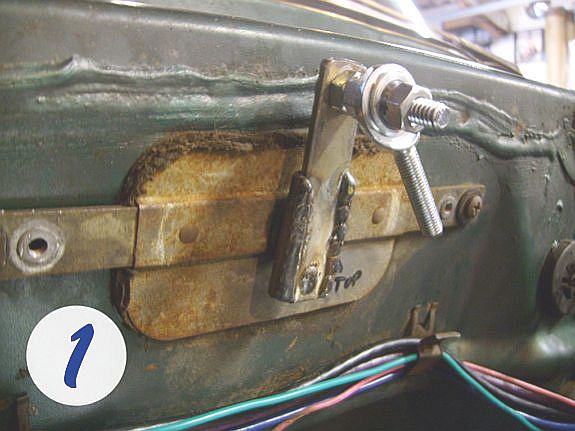
12v Wipers Tech on the Cheap!Old vacuum wipers driving you crazy? Here's a neat tech on changing to 12v wipers on the cheap! -Trent- by The Monster You tired of those sad vacuum motors? Think wiping on rain-x sucks? Dont have a load of cash to go out and buy a "bolt in" fix? Check THIS out! And keep your cable and drum assembly as well! And all for $20 bucks! Im surprised how well it went together on the first try! It works like a champ and has two speeds. Check out the video down below to see it in action! Ill tighten everything up before it is completed, but it works like a dream. The motor is just any 2 speed motor. I picked it out of a pile of used motors on a rack, so Im not sure what its out of. A two speed motor will have three wires. One ground, one 12v wire for fast speed and one wire that runs through a reducer for the slower speed. I did this on my 53, and Im sure this will work for many cars with a bit of tweeking. 1. I removed the barrel/cable assembly to weld on this arm. Drilled a hole in the arm and bolted a bolt with a few nuts acting as spacers. Reinstall wiper assembly but dont attach the cables back onto the drums just yet.
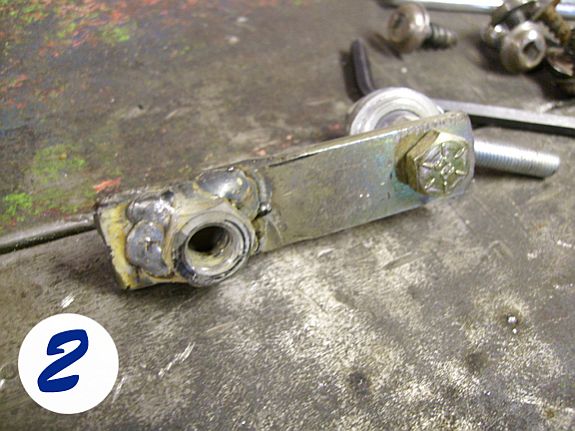
2. The motor I have has a threaded tip on it. So I welded a nut on the arm for the motor. Another bolt and nuts for the other end. Heim joints are going to be used to fine tune everthing later if needed.
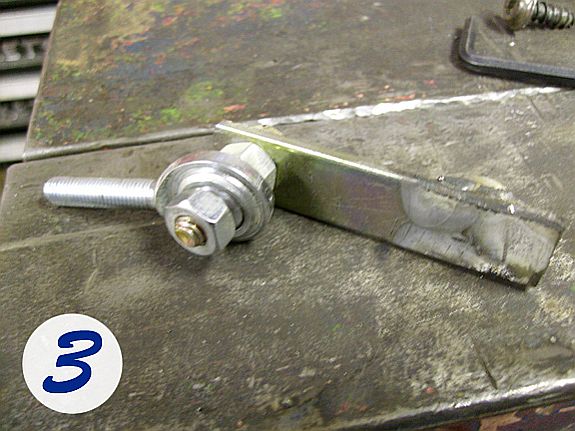
3. Shows the heim joint and arm for motor.
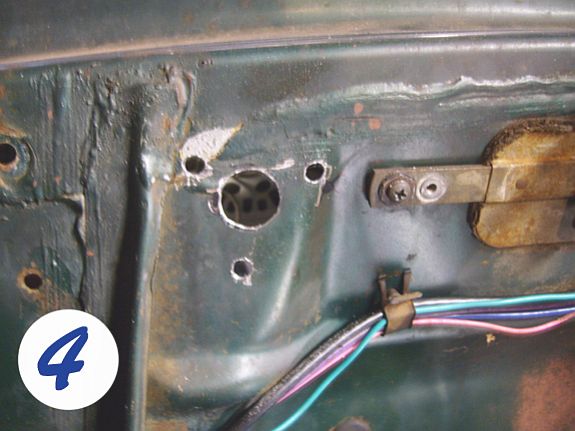
4. Located and drilled out my holes for the motor to mount to from the inside, under the dash.
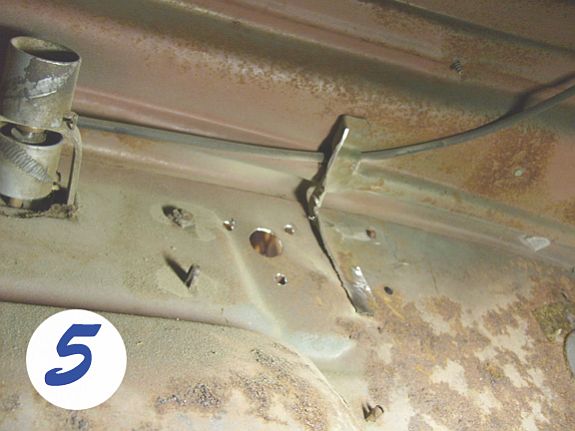
5. This shows the backside of the firewall. Notice the brace here needed to be cut to gain clearance for the motor. The brace was a 45 degree wedge. Youll see it in yours if you do this. Also, the 2 vertical holes parralel to the brace on the right side were already there and I used these holes to loop a zip tie through to hold the motor in place so I could bolt it up in the engine bay. If you have a buddy helping, you could skip that step.
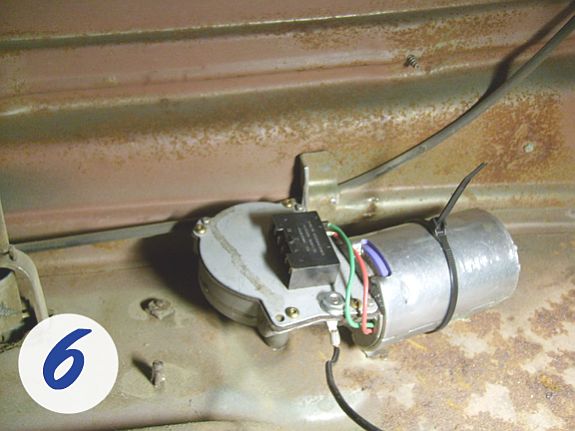
6. Here is the motor in place. Plenty of clearance and yet, tucked up and away of anything, taking up little room. The vacuum lines here can be removed later, of course.
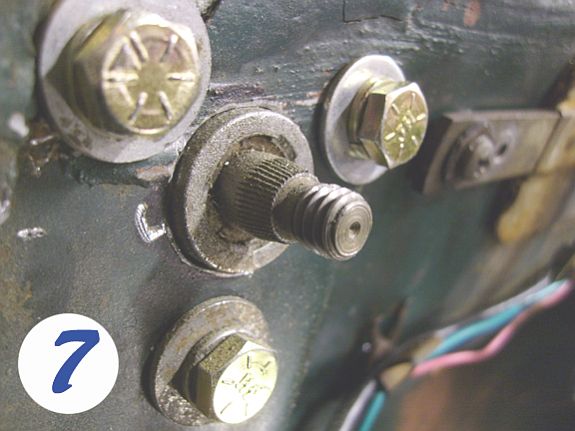
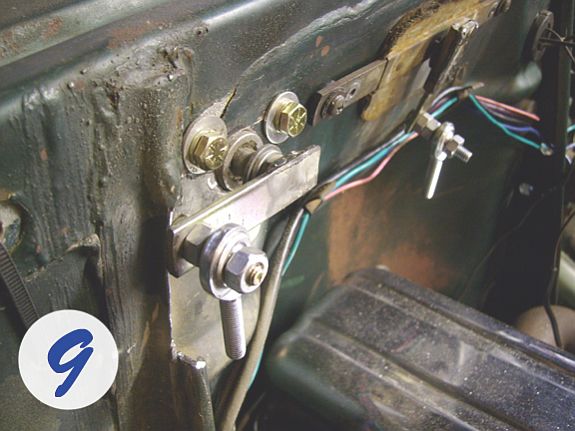
7. Here is the motor and the threaded tip I was telling you about earlier. Make sure that the center of the motor shaft is in line horizontally with the center pivot of the wiper assembly arm.
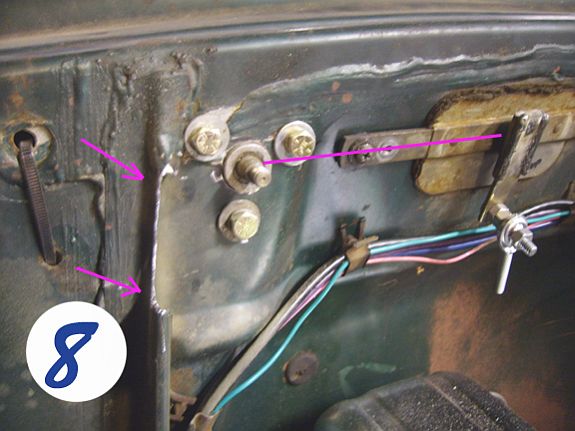
8. Notice the pink line showing the motor and wiper shaft are straight across from each other. You dont want the motor high or low or you'll be making work for yourself later trying to figure it out. Also notice the webbing brace needed to be cut back to allow full travel of the motors arm rotating 360 deg.
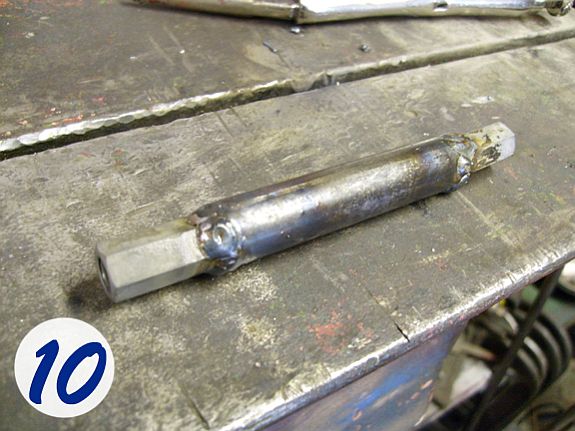
9. Here you can see the need to remove the material for clearance. Now that both arms are installed and heim joints installed, thread on a shank nut (or join nut) on each heim joint. Now measure the distance from each shank nut. The distance is the measurement you will cut from metal tubing.
10. Here is the tubing and the shank nuts. You can use a regular nut, but I like using these when welding them, it gives more area to weld on. Youll need to remove the heim joint and thread it up into the nut, then thread the whole thing onto the other heim joint still bolted to its arm. Slide the heim joint back over the bolt on the other arm and tighten it down.
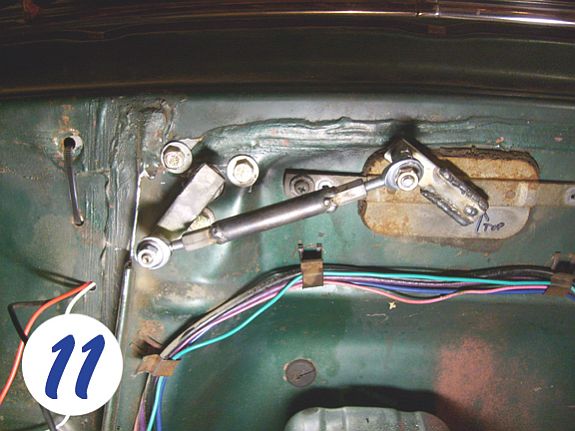
11.The end result should look something like this. I really like the clean and uncluttered look, no one sees the motor, and guys will see the arms and say, "what"? haha!
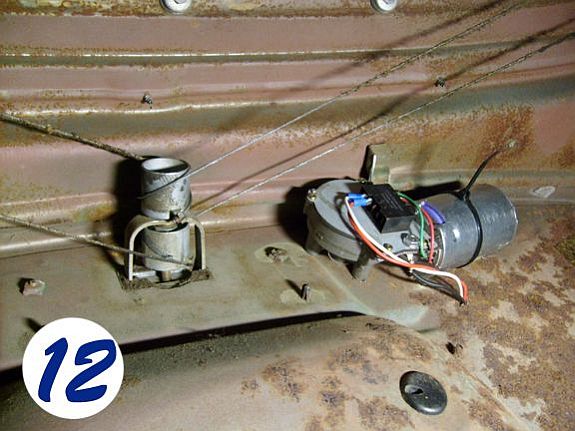
12. Once youre all done trying everything out and making sure it works, just reinstall the cables back onto the drums. Kinda tricky to figure out at first, but youll figure it out. And no cable clearance issues with the motor at all. What a dream!! Now just replace the dash wiper knob with a two stage switch and an inline fuse and you've got it made!
Hope this helps someone! TIP: Longer arms will make it sweep faster and shorter arms will sweep slower. Just make sure when youre making the arms, that they are of equal length from the center point of rotation. As far as the measurement for my arms, they are both 2" long. From pivot point to rod end connection it measures 1-7/8".
Return from 12v Wipers Tech to Tips and Tricks
|