|
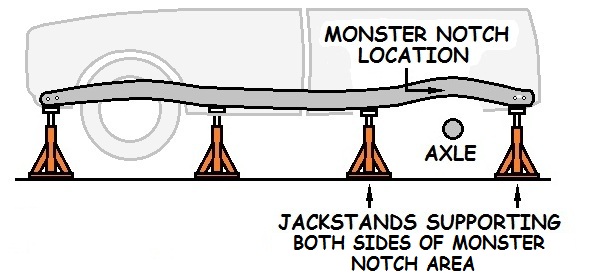
The Monster Notch! How to Lay Frame...The Monster Notch... Ok, so now you want to lay frame, but not sure how to go about notching your frame that much... No problem, we will just make a monster notch in it. You can either do it yourself or buy a kit. There are tons of different monster notch kits on the market, and probably one to fit your ride. They are very affordable, and are easy to put on. Usually the kits you can buy are often the cheaper way to go, as buying sheet steel can get very expensive. However, if you can get ahold of it cheap, then doing it yourself is a good way to go... However, if one isn't available for your specific model, you will have to do it yourself... First you want to get your frame up where you can work on it. Jack it up, get it on GOOD jackstands, and level it side to side at the front and at the back. You can use flat pieces of metal to shim the jackstands if you need to. It's good to have a jackstand on each side of the monster notch you're going to make. (Just in front and just in back). This will support the frame as you cut it and will keep it from moving...
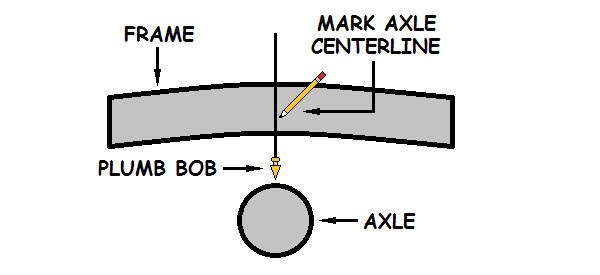
Now then you want to grab a plumb bob (a weight on the end of a string that will show you a perfectly vertical line) and mark where the center of the axle will come in contact with the frame. If you don't have one, just tie a steel nut to the end of a string.
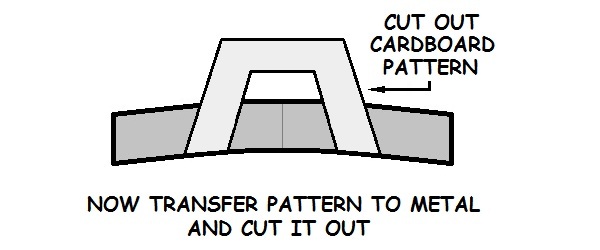
Ok, now that we know where we want it, you will have to scrounge up some steel plate. You're going to want some about 3/16" 1/4" thick. Now you need to figure out just how much above the frame you will need to go. Measure where you will want the frame to end up (from the ground to the bottom of the frame). Now measure from the bottom of the tire to the top of the axle. You will want the bottom of the frame to be 3-4 inches above the axle with either the frame on the ground or the suspension fully compressed. Once you have figured out just how much you need to go above the frame, you want to cut out a pattern from cardboard or posterboard. You want to have plenty of room for the axle to not only move up, but to move back and forth. Depending on the suspension, the axle will usually move in a small arc rather than straight up and down. So give your self plenty of room.
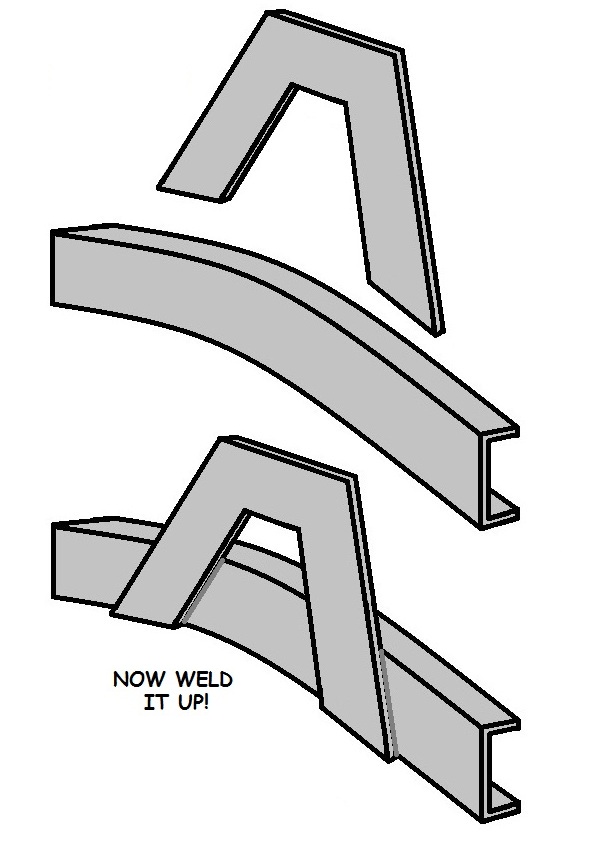
Now trace your pattern onto your steel and cut that part out. You can use a torch, cutoff wheel, sawzall, plasma cutter, etc. Now finish grinding and cleaning up your part. Neatness counts! (It makes the pieces fit together better making welding easier and makes it look like you know what you're doing!) So far we've done this:
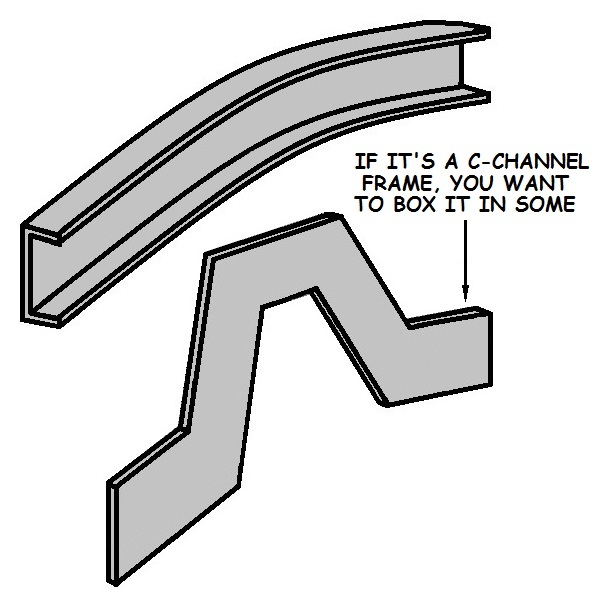
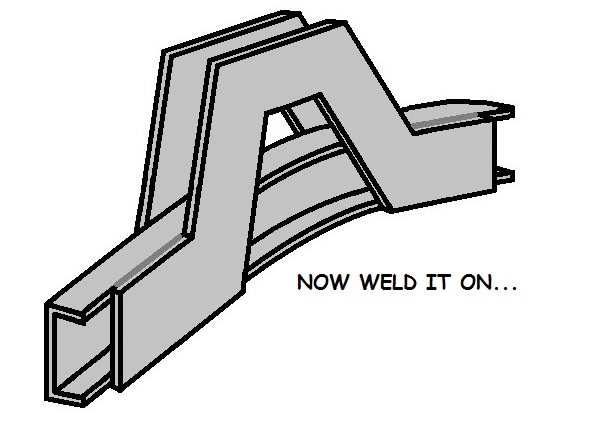
Now do the same for the other side of the frame. Note: if your frame is a 'boxed' frame, just use your pattern to make an identical piece. If it's a 'c' channel frame, you need to box it in for strength. Just make another pattern the same as the first, but with added sides going down the length of the frame about a foot either way.
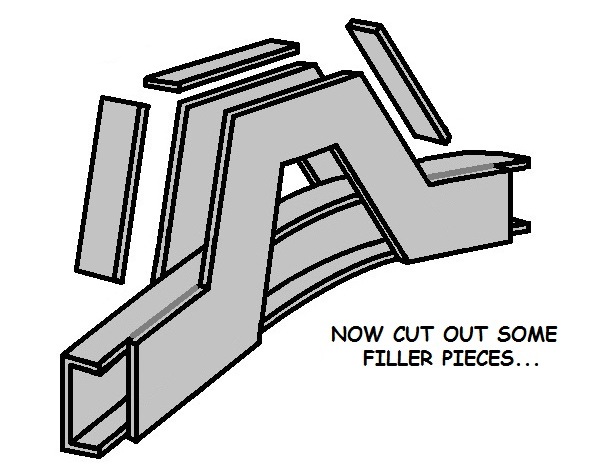
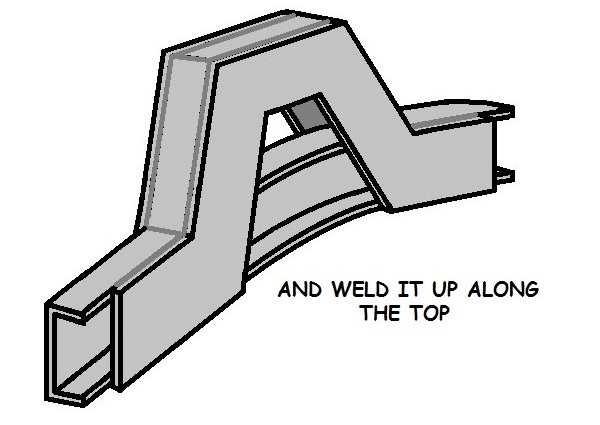
When you weld the piece in on the other side make sure it's perfectly square across from the other one you welded on. If you don't, you will have trouble filling in later on... Now cut out some pieces from your steel to fill in the top and weld them in.
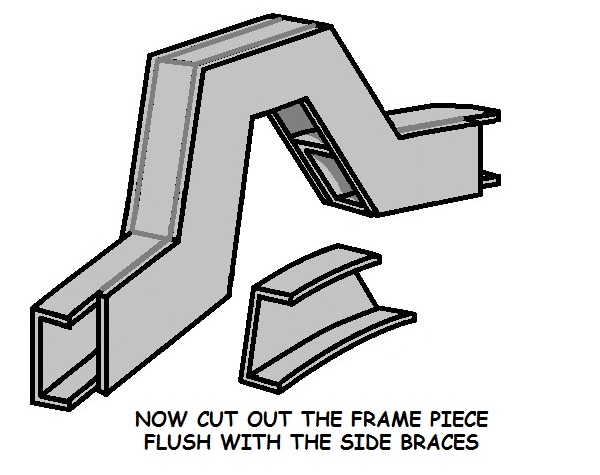
Now you can cut the frame off flush along the inner side of your pieces:
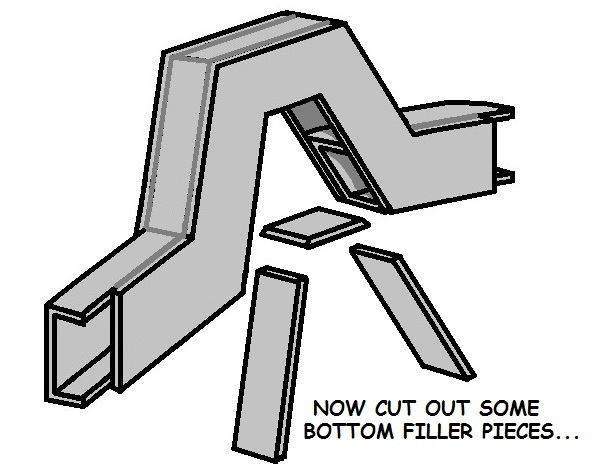
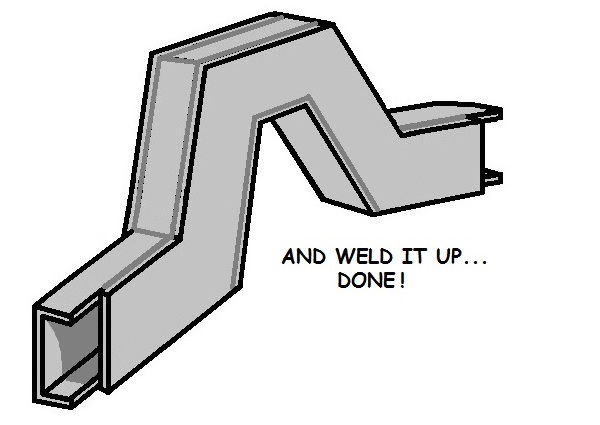
Now you can cut out some more pieces from your steel to fill in the bottom and weld them in.
Now everything is tied in nice and solid. Good Luck!
Return from Monster Notch to Suspension
|
