|
F100 Solid Axle to Independent Front Suspension on the Cheap!Is your F100 solid front axle all over the road? Here's a neat tech on changing an F100 solid axle to independent front suspension on the cheap! There's a lot of good universal info in here, good for a variety of front end swaps on lots of different vehicles... -Trent- Jag XJ6 IFS into F100 by matt2491
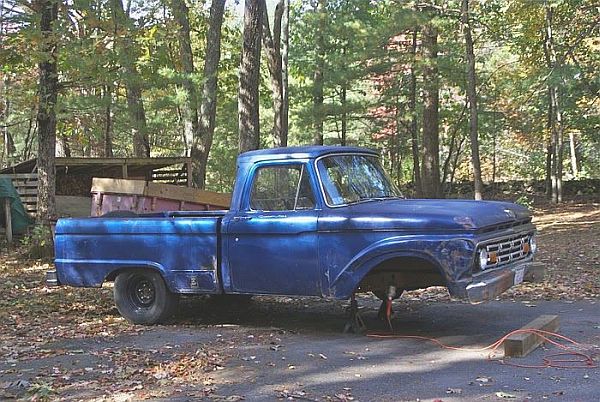
And thus we begin the all-intensive front suspension swap to rid my F100 of its poor ride, vague steering, and nose-bleed stance. You see, this F100 is my daily driver. But it is also an old truck with a host of worn out components that drives with the grace of a tractor. And since I had pretty much decided early on that I planned to drive the wheels off of this thing for years and years to come, some major upcoming modifications became apparent. I wanted to go through the entire truck, build it the way that suited me, and know that it would be a reliable and cool ride that I can hop in at a moment’s notice and drive anywhere in the country. The first of these major upgrades would be in the chassis department. The beauty of an IFS swap is that it upgrades your suspension, steering, and brakes all in one fell swoop. Sure, the old leaf spring & I-beam axle setup worked okay (and I certainly don’t think you could call it weak or unreliable), but it just didn’t offer the kind of smooth ride and responsive handling that I wanted in a vehicle I might drive coast to coast one day. Thus I went into this project with a singular attitude in mind: Do not take any shortcuts. Do it right from start to finish, no matter how much time or effort it took. I also kinda applied this logic to money. Basically, don’t be cheap and skimp on important parts. Do it right the first time. Otherwise, it’s not gonna be worth a crap in the long run. Upon doing an initial search on IFS swaps, I realized that the perfect solution did not exist merely because everyone has a different idea of what the perfect IFS has to offer. So, I needed to decide what the important points were for me and make some compromises. An early survey suggested several valid candidates. For example, there was the Crown Vic swap, which was very appealing due to its modern aluminum design and the fact that it practically bolts into place under the F100 chassis. There was the Mustang II swap, via an endless supply of bare crossmembers through complete hub-to-hub kits available from your favorite mail order store. There was the Volare swap, a tried and true old school method that got these trucks down where we wanted them. And it goes on and on. Custom kits, subframe grafts, etc. It was all out there. Honestly, I was a bit overwhelmed. I was led onto the Jaguar front end by our very own ElPolacko on the HAMB. Actually, I had wished to ask about the Dakota crossmember that he manufactured since those who had used it seemed to really like it. Unfortunately, I soon found out that they were no longer available. I was a few months too late. “I suggest you look into something like the Jag XJ front suspension,” said ElPolacko in short reply. So I did. I went to Google, punched in my query, and stumbled upon a few gems hidden away in the furthest corners of the Internet. Apparently, the XJ6 front end was a very popular swap down under. Those Australian hot rodder’s had it down to an art, especially with the ’53-56 Effies. I ultimately decided to go with the XJ6 front end because of its strong, compact design, elegant looks, and modern components (like rack & pinion steering and disc brakes with big 4-piston calipers). It was clearly a nicely engineered front end that would be a big improvement for the F100. Where other IFS options failed, the Jag front end prevailed. Unlike the obscenely wide Crown Vic, the Jag nails the track width to suit the F100 (59.5” compared to the stock 60”). Unlike the under built Mustang II, the Jag is designed for a vehicle in the same weight range, if not a little more, as the F100. Unlike the hassle involved with installing a Volare clip, the Jag’s crossmember easily fits a variety of frames. It will pretty much fit under anything and look good doing so. For me, it also came down to the little details. For example, the Jag features forged control arms, which are plenty strong and look nicer than stamped arms in my opinion. There are no strut rods to worry about either. Also, the hubs have the same 5x4.75” Chevy bolt pattern, so many wheels will bolt right on. I have heard some people complain about the center of the hub being too big to fit the center bore of some wheels, but my regular smoothies fit without issue. And now that I’ve exhausted my reasons for why the Jag swap is a serious competitor in the IFS market, it’s time to put one under a ’64 F100. The first step is to get your butt down to the junkyard and snag the front end out of any ’79 through ’86 XJ6 Series III. The XJ12 cars will also work, but they come with higher rated springs, which may or may not be helpful for your application. The XJ6 springs turned out to be just right for my truck.
One note I would like to make about the Jag crossmember is that regardless of what you put it under, it can be made as easy or as difficult to mount to the frame as any other swap. However, there are two main ways to do it. The first way is to simply fab up a couple forward and rear frame brackets, and then bolt the crossmember right up, retaining all of the original rubber bushings, for an ultra plush ride. The benefit of this method is that the crossmember remains untouched, making it easily replaceable, and that the whole front end can be unbolted from just four points.
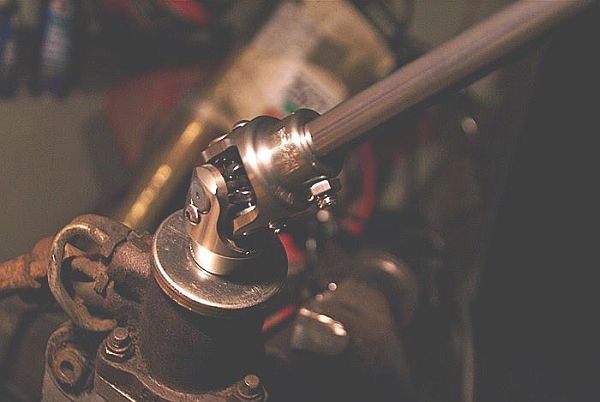
If you go this way, you will have to use the original Jag Z-joint in your steering hook up to make up for the movement in the rubber mounts.
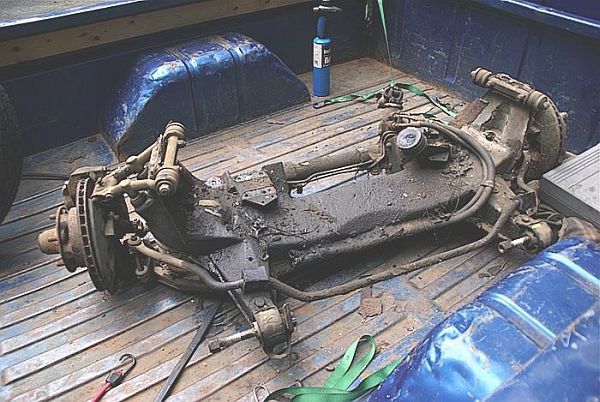
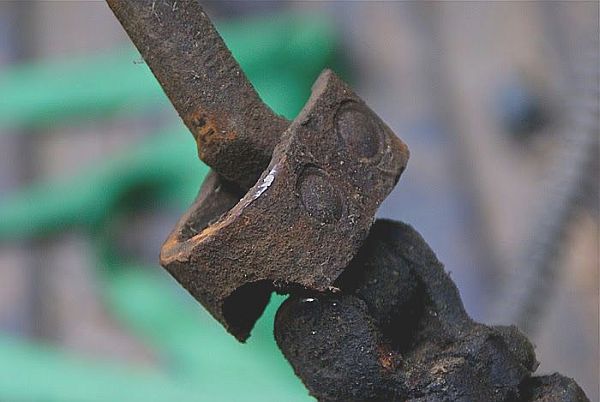
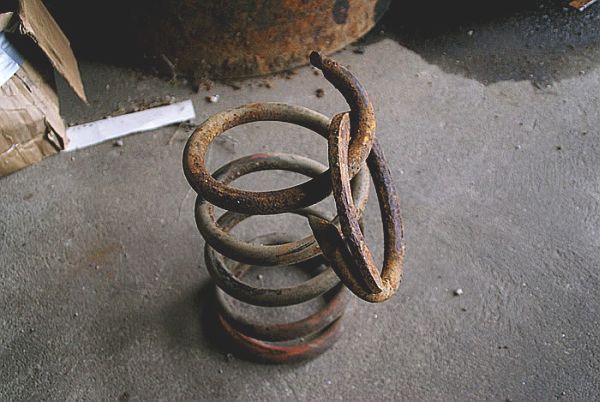
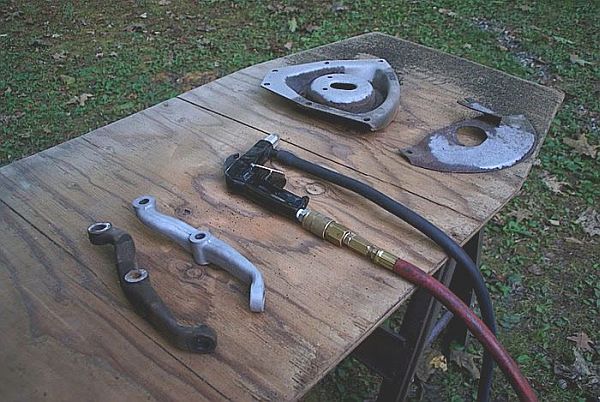
I suppose there are also fancy telescoping shafts you can buy from Borgeson and the likes that will work just as well, but make sure you’re buckled up before looking at the price tag. The second way is to cut off all the extremities and fabricate some perches to mount it up sleek & solid to your chassis. You can either weld or bolt it in at this point. The advantages here are a more responsive road feel and you can get the vehicle an inch or so lower at the same time because it attaches directly to the frame. Now, here’s the thing- If you choose to go with bolting it in, you have the benefit of still being able to drop out the whole shebang by unbolting it, but you keep the tighter suspension feel. This is my idea of a winning compromise. Off to the junkyard we go. The ’82 Jag I pulled my front end out of had been crushed down in the mud under another car for who knows how long. It was at least 90 degrees out that day, and conveniently the car was black. I nearly passed out wrestling the front end out from under the car. It took a good 4 or 5 hours working at it alone. But alas, it came out. I forked over $150 for it and dragged it home in the truck it would soon be married to. Upon disassembly, I discovered that it had a broken spring (not surprisingly- probably from having another car dropped on it).
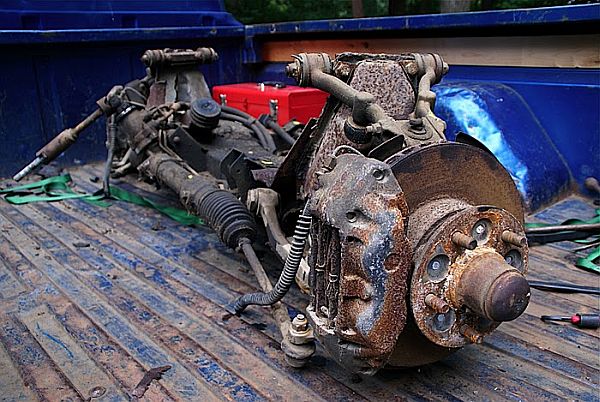
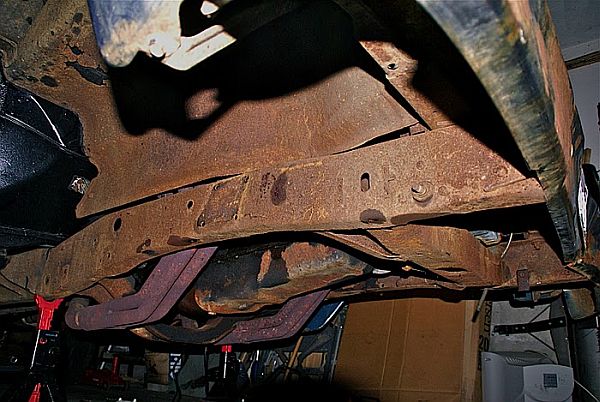
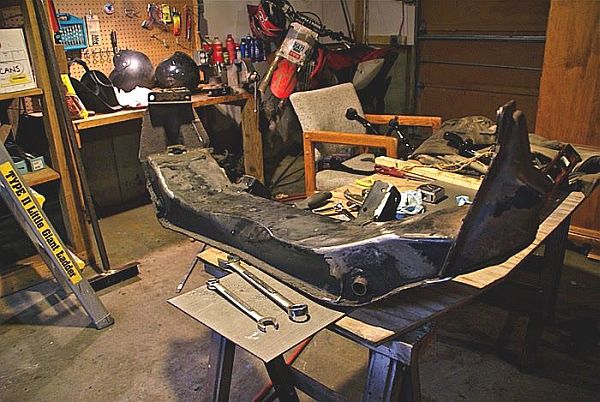
I was off to a rough start. On the plus side, nothing irreplaceable was broken or bent. But man, the whole thing was a disgusting caked-on greasy mess. I scraped ¼” thick layers of grime off it while asking myself if I should just cut out this hot-rodding hobby nonsense. The next step was to rip out the old suspension. The truck decided to fight me all the way too. It took all of a weekend for me to cut out a few rivets and extract some frozen bolts. I could tell from how my project was going so far that this was going to get a lot more fun.
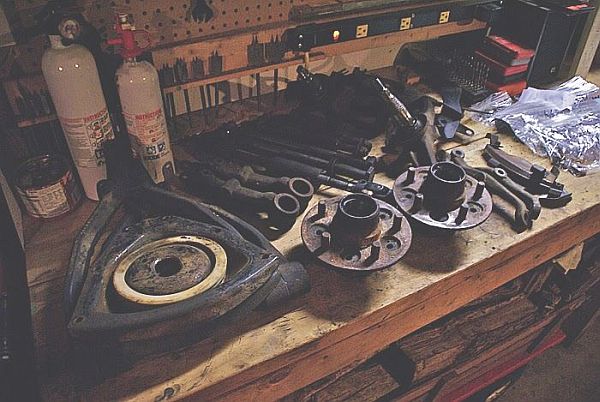
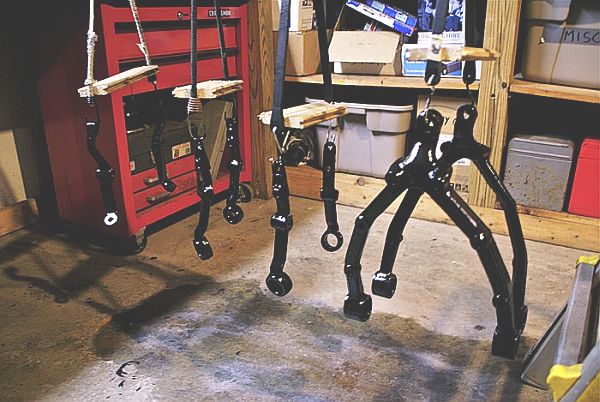
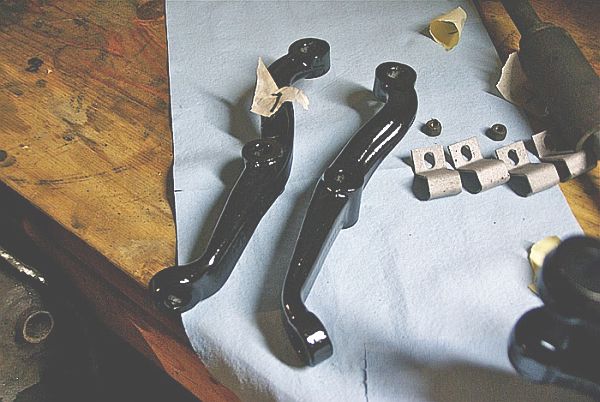
At that point, I needed to sit down and stare at the Jag IFS for a while, and figure out how I was going to mate it to the F100. After sufficient time spent listening to oldies and looking at all the stuff strewn about the garage, I realized that the most important measurement to get was the axle centerline. F100s sitting at stock height look just dandy. But as soon as you lower them, as many of you have discovered before, the wheels tend to appear pushed back in the fender opening. It’s a subtle visual thing, but since we’re doing a whole front end swap anyway, why not make it look right while we’re at it? All we need to do is nudge that centerline forward an inch or two, and then the truck will look rad. Once the axle centerline was determined (1.25” forward of the original), the next step is in figuring out how to physically marry the crossmember to the frame. I am no pro fabricator, nor do I have any specialty tools. Just a Hobart flux core machine and a couple hammers formed my basic tool palette. In fact, I had never done anything like this before, and since the truck is my daily driver, I also couldn’t afford to have it off the road for too long. That meant leaving the 292 and front sheetmetal all in place, and working at the swap from underneath. Fortunately, I convinced my parents to let me takeover their garage for the duration of the project, which proved to be a huge help. What a sad SOB I am… :P In the meantime, I began stripping the various parts, and painting them with KBS RustSeal. I am very impressed with the quality of KBS products. They are a lot like POR15, but a tad cheaper and a tad better.
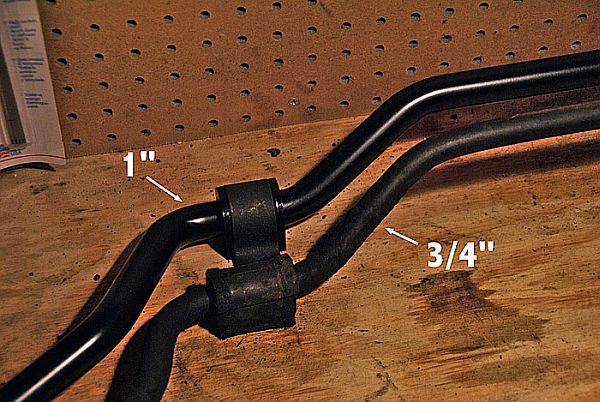
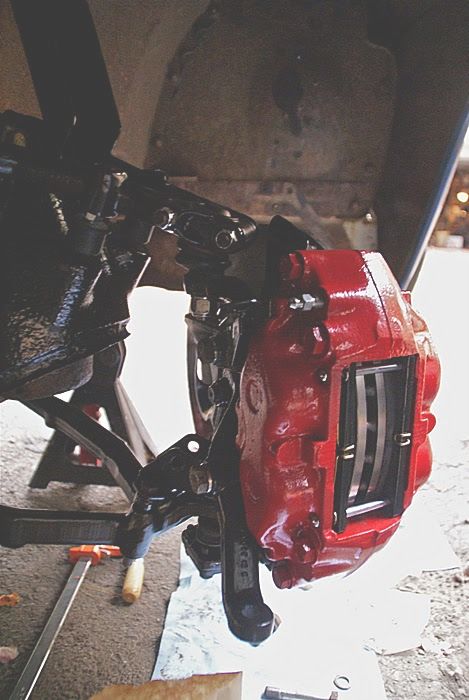
I also began ordering stuff to rebuild the suspension. I called up Andrew over at Jaguar Specialties and he walked me through the process. There are a few idiosyncrasies with the Jag IFS that you should be aware of when rebuilding them. I can write more about these for anyone who is interested. I treated myself to an upgraded 1” solid swaybar with poly bushings and end links. I decided to stay with rubber for the control arm bushings though, since I was hard-mounting the IFS anyway. I didn’t want the ride to be jarring. New Lemforder balljoints, Brembo rotors, etc. etc. completed the package. Of course, all of this can be gotten for less from places like RockAuto or even your local parts store. But whatever.
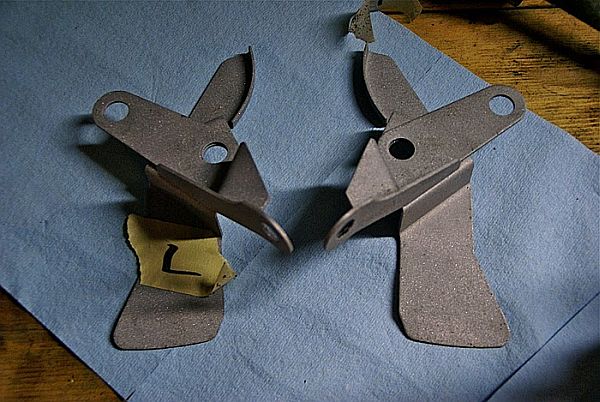
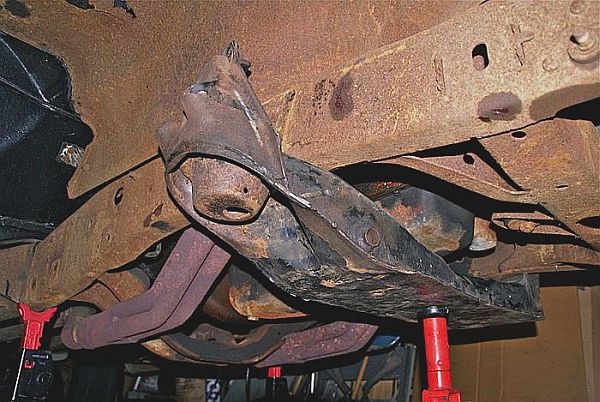
Since I wanted to solid mount the IFS, I cut off the awkward crossmember mounts and cleaned it all up with the grinder. I also trimmed any extraneous parts that didn’t need to be there.
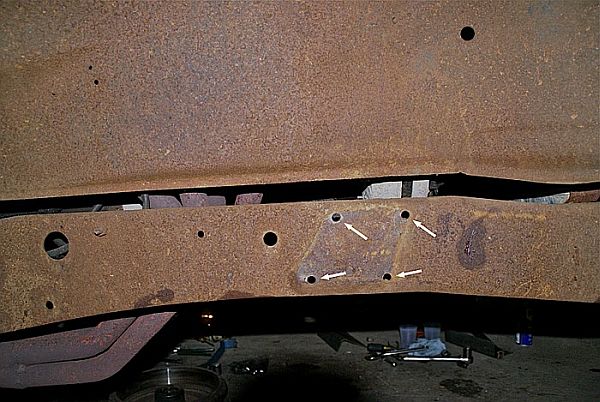
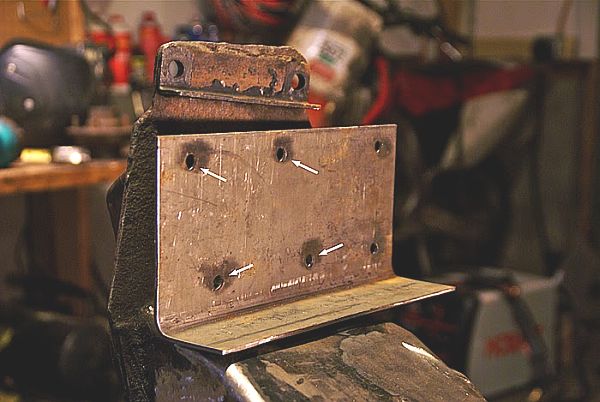
With the old suspension removed from the truck, it was easy to tell where the crossmember naturally wants to bolt up to. The original shock mount bolt holes are the perfect template to work from.
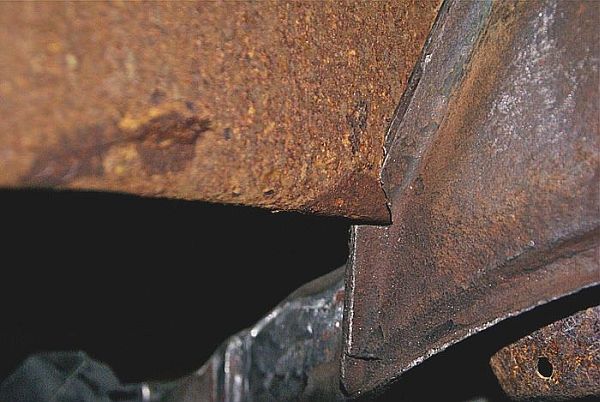
I jacked the crossmember up to the chassis, only to discover that the corners of the crossmember foul the frame rails by less than an inch on either side. Its an easy little section to cut out. By the way, the F100 frame is 34” wide- so I wouldn’t try using the Jag IFS on anything wider.
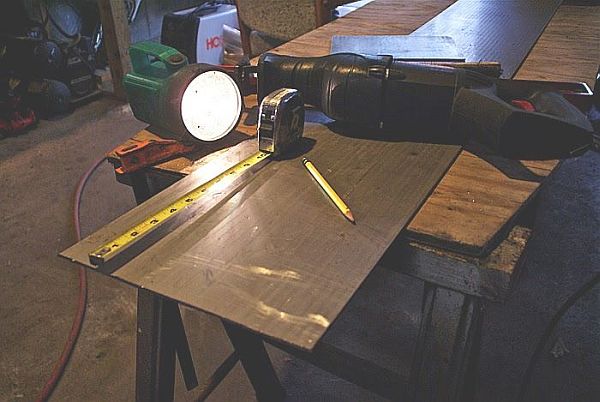
The crossmember hugs the chassis nicely and we are now getting into the thick of the action. I got myself a 10 inch by 6 foot piece of 1/8” cold rolled steel to form the mounting cradles out of.
Then I measured twice, cut once, measured again, and bent once. I had to make a ghetto bender since, you know, I don’t have any real tools. So pathetic.
In reality, it’s a GOOD thing that I couldn’t force the bend into a tighter radius. I ended up with two pieces that fit the profile of the frame rails very well. So I was happy. Onto step #386: welding the cradles to the crossmember. Because the pieces are 1/8” wide, I shaved another 1/8” off each corner of the crossmember where it contacts the frame.
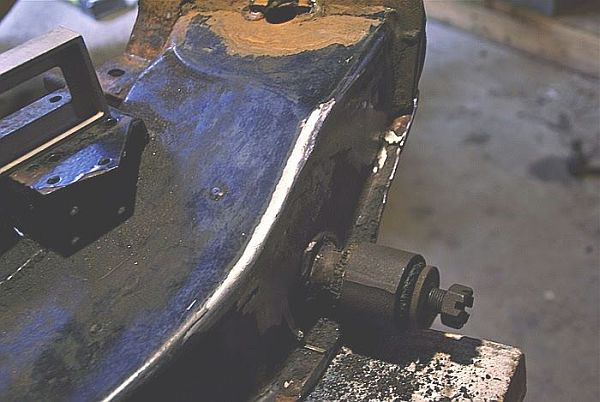
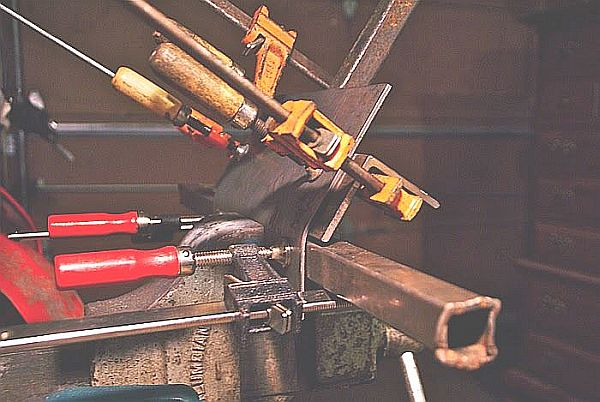
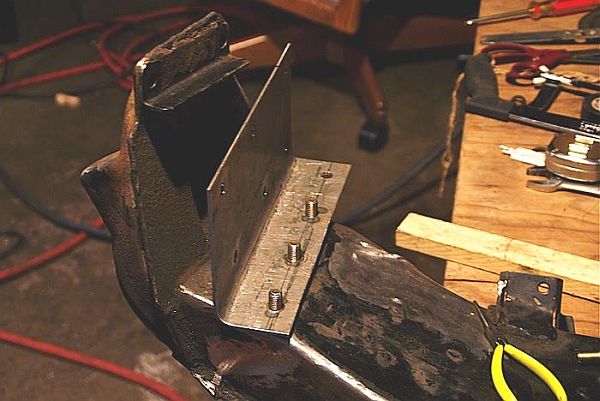
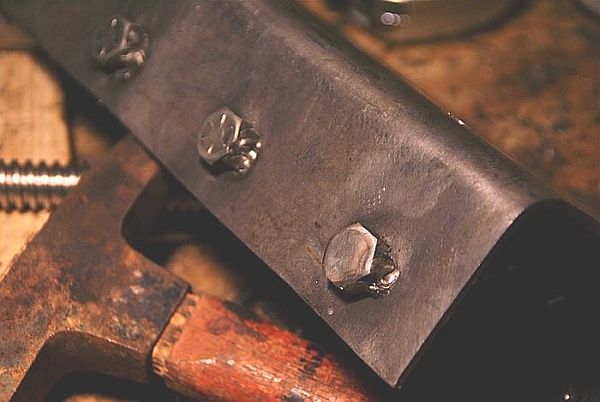
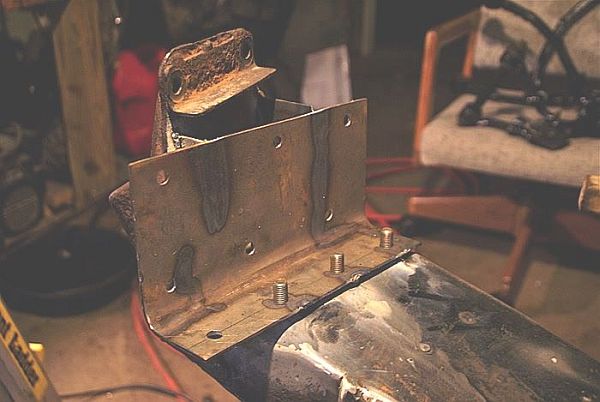
In a careful balancing act, I jacked the crossmember up to the frame with the cradles slipped in place. The measuring tape and a couple taps with the hammer got everything locked into place. Shit, I thought to myself, this is actually going according to plan! Now it becomes a game of measuring and marking, measuring and marking. Here’s an important note for all of you who do this swap: The crossmember should sit flatly against the bottom of the frame rails. Not only is it convenient for mounting purposes, but it will also give you good caster settings down the road (pun… intended?) The thing to do now is to locate all your bolt holes, drill them, and keep trial fitting the whole assembly until it fits just right. I didn’t want any chance of the crossmember fatiguing over time from any twisting or stress, so I kinda went overboard with the bolt in procedure, adding four vertical studs to lock it all in solid.
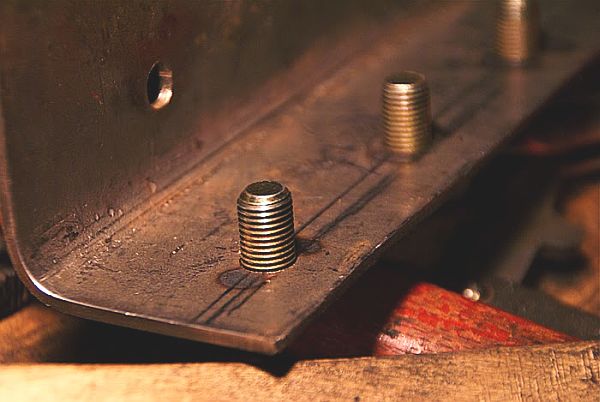
The ‘studs’ are really just grade 8 bolts that I pushed through the backside and welded in place.
Like we said earlier, the shock mount holes make perfect bolt in points, along with two more in the back for additional support.
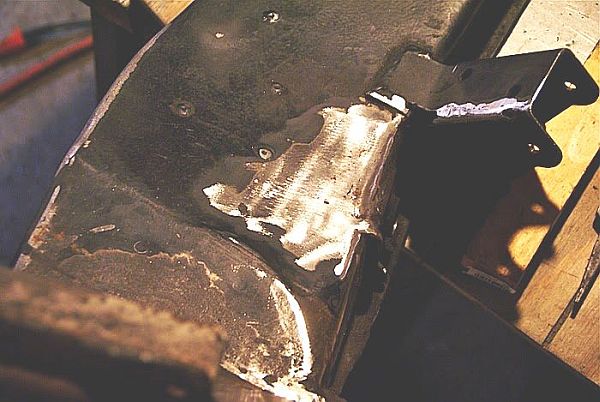
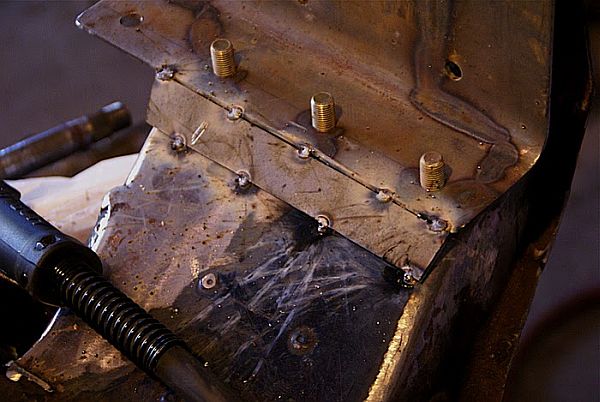
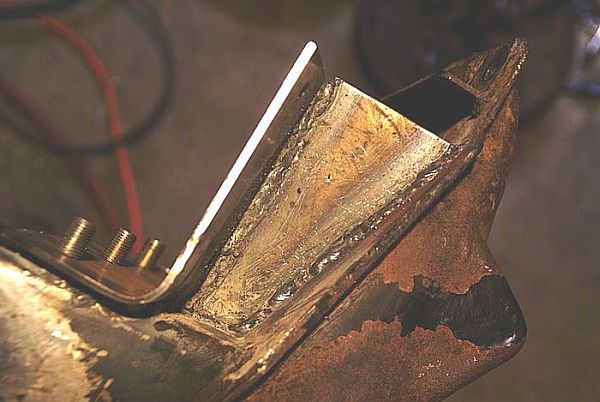
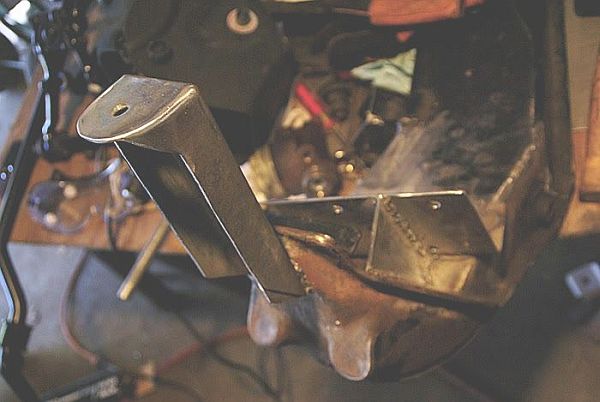
Finally, it was time to make the design a bit more permanent. The crossmember went back under the truck with the cradles in place. Once everything lined up correctly, and the butterflies in my stomach settled, a few tacks here and there assured that the pieces wouldn’t move on me when I pulled it out to weld it all together. I gingerly lowered it and moved over to the bench. I was really new to welding (this was my first time) so I practiced laying a few beads on other pieces first, then dived right into the finish welds on the crossmember.
I added gussets where it looked necessary, and went wild with the welder, hoping it would all be okay.
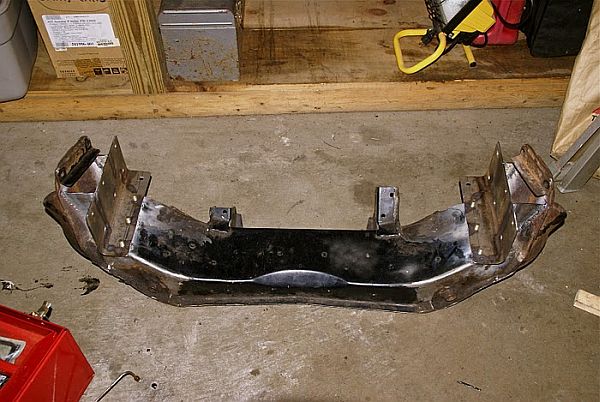
When the smoke dissipated, I was looking at this:
Not too bad if I do say so myself!
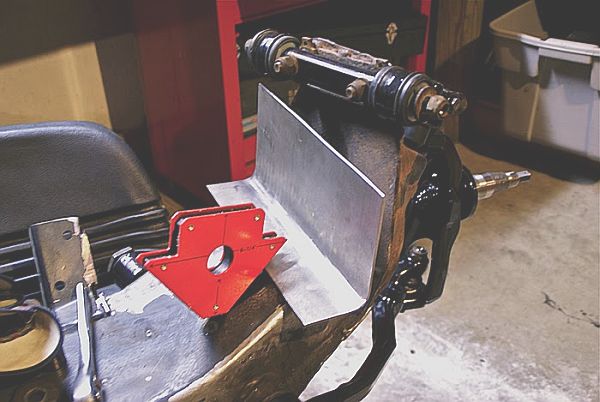
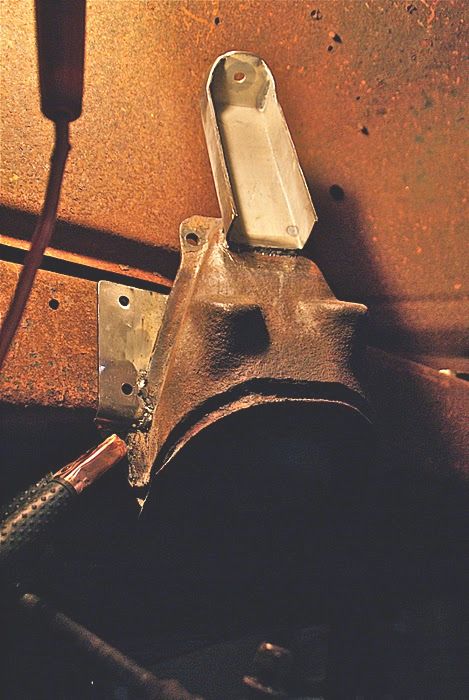
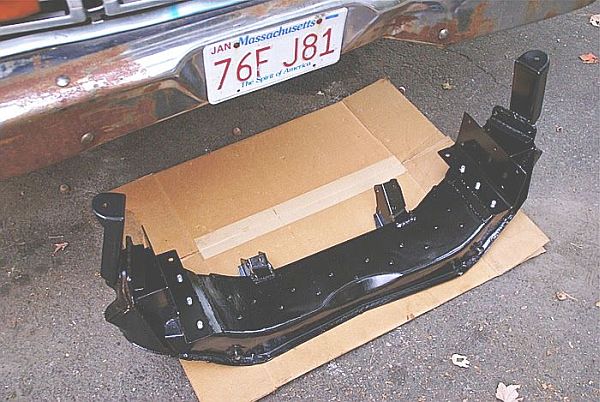
I test fit the new crossmember to the frame. To my relief, it slipped in place like a dream. Onward we go! On to the million other things that need to be done. Shock mounts. Hmm… From what I had seen online, people had done it in nearly every way imaginable. I took a step back and went with the most logical approach. This is what I came up with:
It works fine, looks fine, and it even keeps the front suspension all self contained (meaning you wouldn’t have to unbolt the shocks to drop out the whole thing). I like little details like that. (I am probably going to reinforce the shock mounts, though...) Sweet! It looks like we’re done with the crossmember. Let’s lather it up in paint and install it!
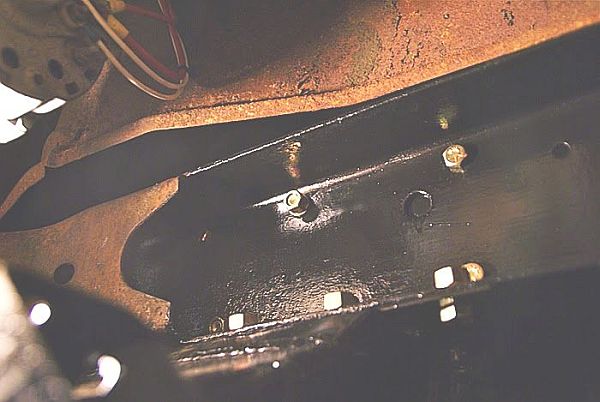
Ten bolts per side with some loctite does the job.
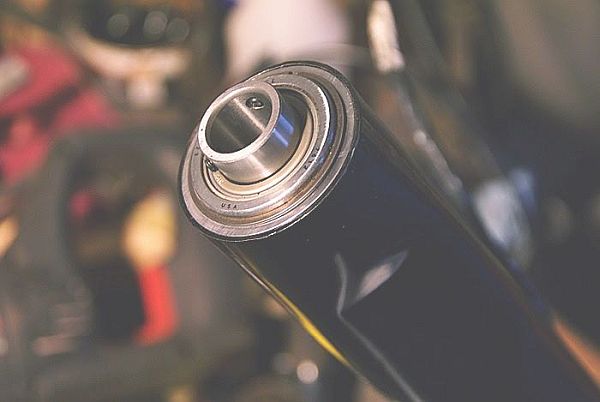
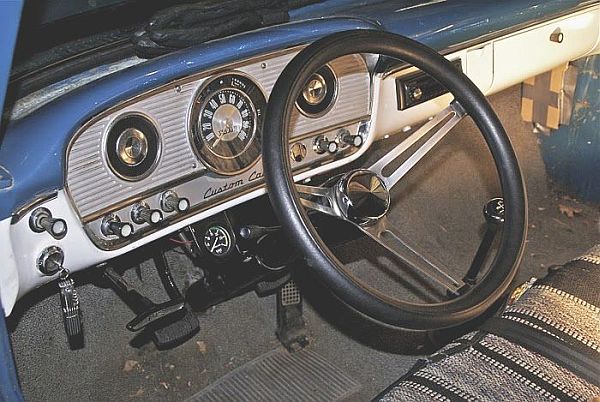
Okay, so now what? Steering. Well this was kind of a puzzle. I wanted to keep the original column but obviously had to hook it up to a rack & pinion. F100s have an integral shaft and gear box, so the first thing to do is cut it off leaving as much of the shaft available as possible. But now the shaft is just flopping around at the bottom of the column? No problem. We’ll buy a bearing from McMaster Carr, get a friend to turn down a collar to press the bearing into, and then slip it into the end of the tube.
At this point, my parents kicked me out of the garage under the reasoning that their precious Toyota Camry and Highlander take precedence over an old truck. :P
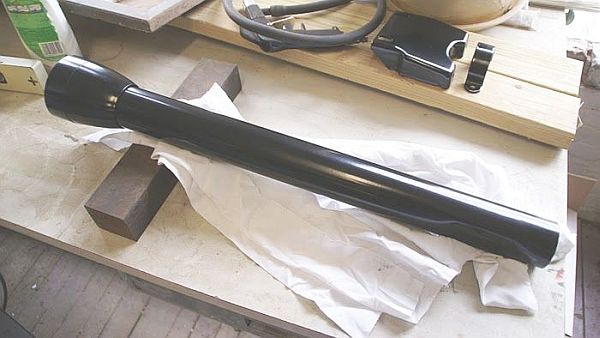
That’s cool. Challenge accepted. I shaved the automatic lever stub from the column and called it good. Up to my Dad’s shop we went for a little home powdercoating. The column just barely fit diagonally in the oven. Semi-gloss black does the trick. I am a believer in powdercoat.
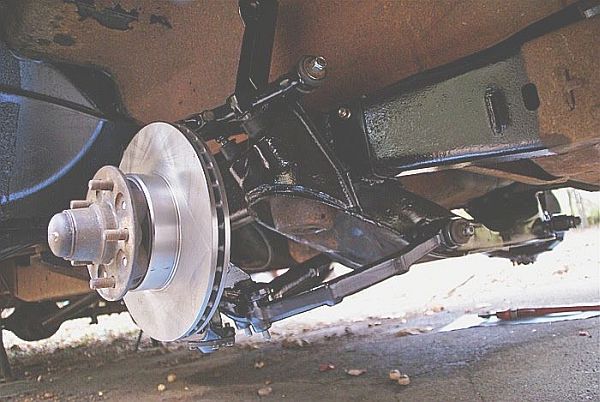
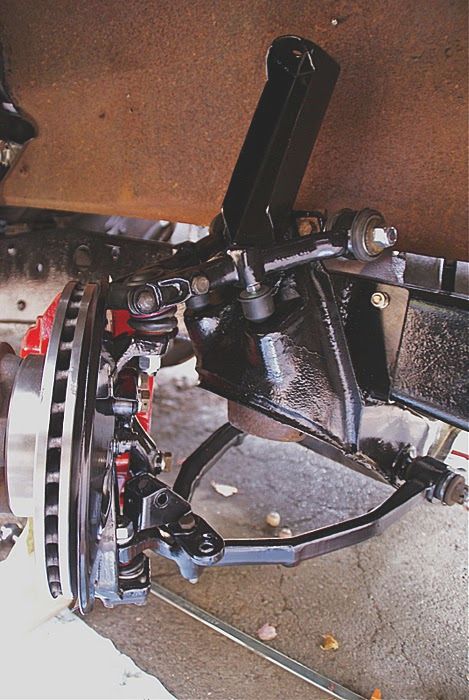
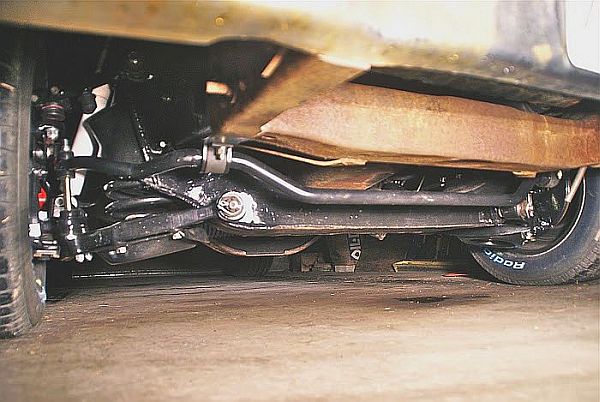
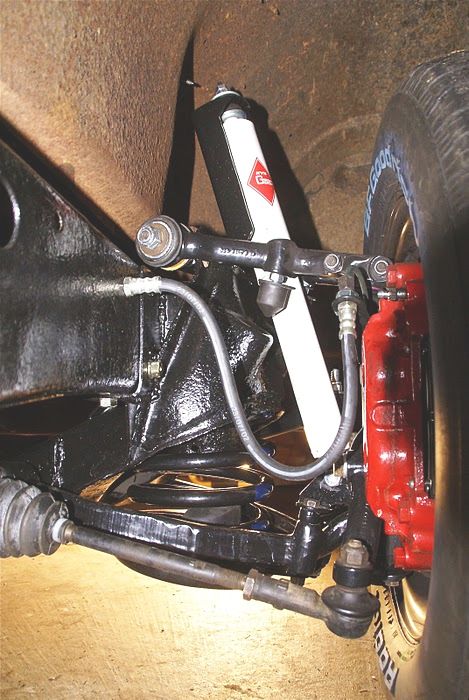
Oh boy. It’s time. Time to begin the final assembly! From here on out should be a lot of fun. On go the control arms, on go the spindles, on go the hub & rotors, the calipers, the steering rack, the springs, the shocks, the swaybar. Isn’t it grand when it all comes together?
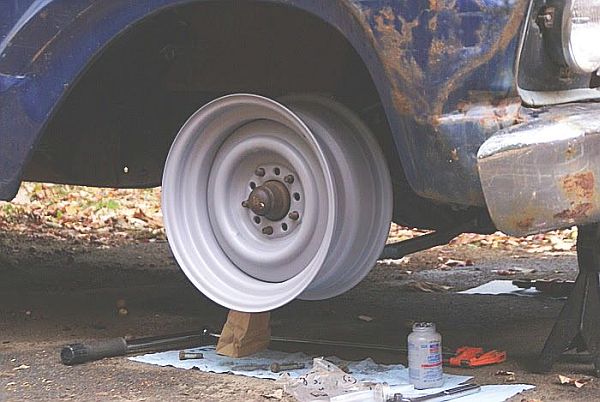
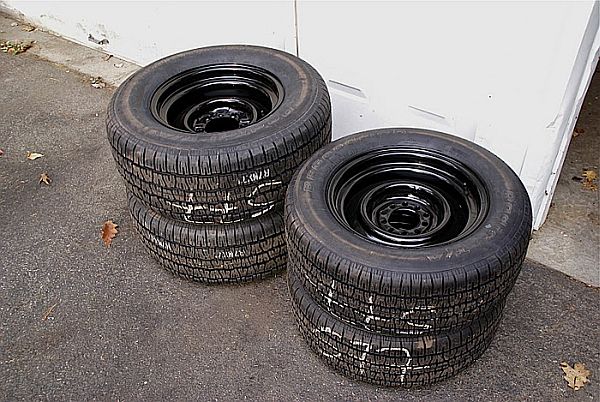
Well aware of all the comments regarding Wheel Vintiques, I went ahead and bought a pair of their 15x7” bare smoothies from Summit. Can’t beat the shipping… The wheels showed up and I had to throw em on the truck for a peak.
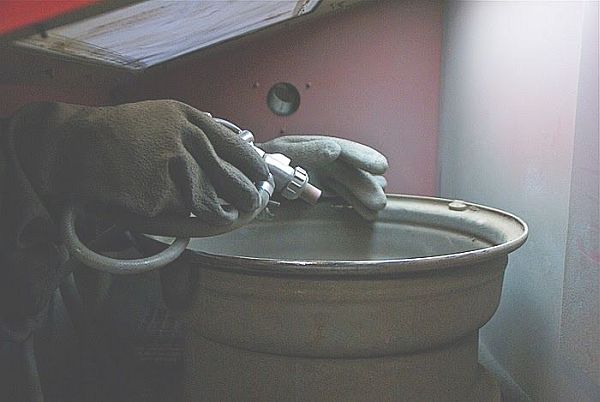
Thank goodness everything fit. No clearance issues with the hub or caliper. Off to the shop for powdercoating.
Everyone says to not skimp on steering components, so I didn’t. Flaming River stainless u-joints and a ¾” DD shaft connected the column to the rack. Be sure to order the special joint to fit the Jag end. It’s 48-spline. (I carefully ground down the end of the stock truck column 3/4" shaft so there were two flats on each side, effectively making it a DD shaft. It's not hard but I didn't get pics of that step.)
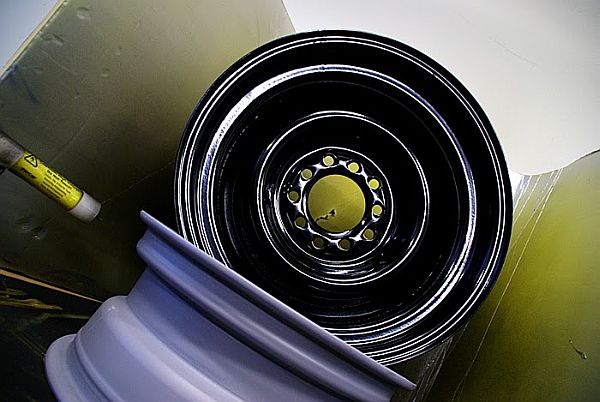
With the wheels back in black, I got some good ol BFG Radials mounted on them. 275/60/15 and 225/60/15. I think they will look nice. Don’t you love the smell of new tires?
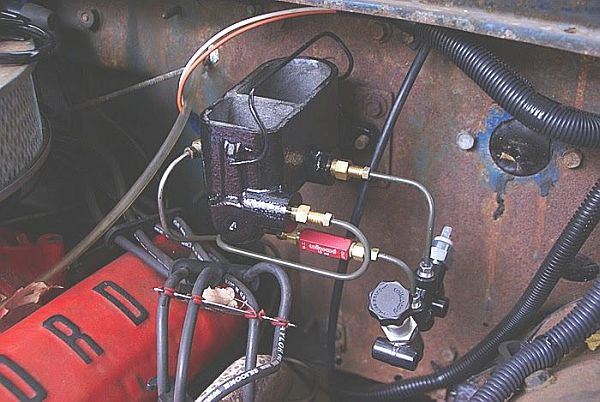
We’re almost done! Oh, but wait. We’re missing brakes. This is actually a fairly confusing subject since everyone has something to say about master cylinders and yadda ya. After extensive research, I opted for a 1974 Maverick 15/16” manual master cylinder. I don’t like power brakes, but I wanted to make the most out of the nice Jag brakes. This cylinder bolted right up, but I had to extend the pushrod by about an inch to appropriately actuate the cylinder. It got a coat of the KBS paint too.
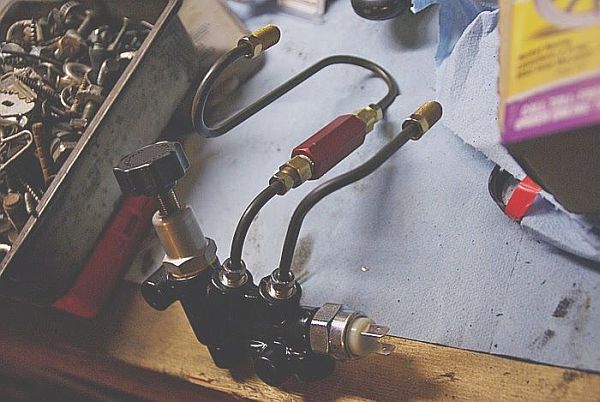
For hydraulics, I ran a 10psi residual pressure valve through a proportioning valve (yes, I'm going to make a mount for it) to the rear circuit, The purpose of the RPV is to keep ever-so-slight line pressure on the rear drum wheel cylinders so they don’t retract too far in when off the pedal. You would have excessive play otherwise. Disc brakes are a lot more effective in maintaining consistant feedback once settled in, so the front circuit was simply run through the proportioning valve and split into left and right lines. (You'll have to get an adapter or two to make it work. 10mm Jag brake lines to F100 3/16" and 1/4"...)
After buttoning up various loose ends, the project was done.
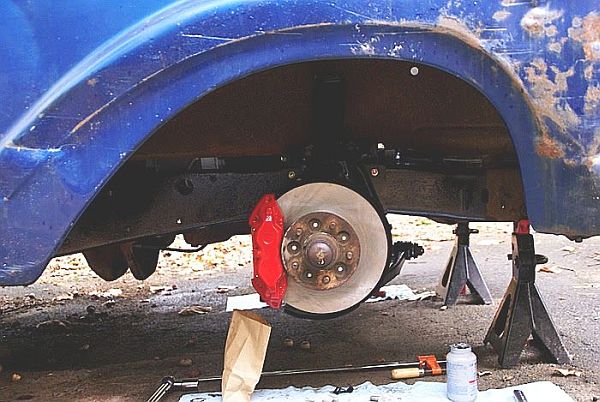
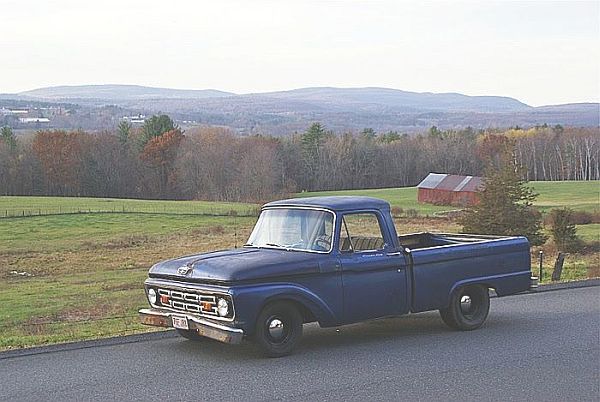
Now there is only one step left. DRIVE. And what better way to do so than on a crisp Fall day in western Taxachusetts?
Godspeed. Return from F100 to Suspension
|