|
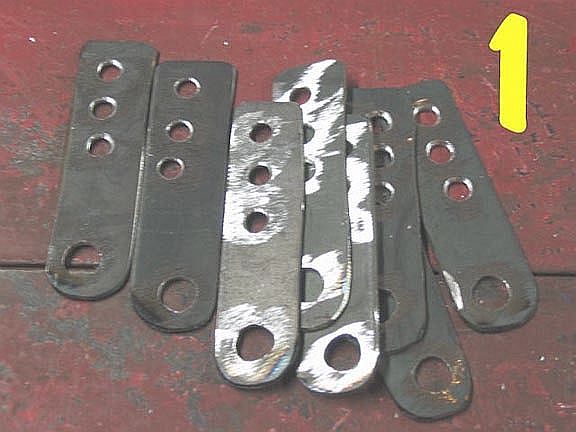
Bear Claw Door Latches-This tech is to install "bear claw" door latches.It covers a 4-door, but will work with a 2 door. -Trent- by The Monster Well, this is my first tech post. I know bear claw latches have been covered before, but not with a 4door. The obvious reason this install is different is because of the center post being used for both the front door and the rear suicide door. I've numbered the photos and I'll explain what I came up with to make it work in such tight spaces. I'm working on a 27 Dodge 4 dr sedan #1 First I started out making my linkage pieces to straddle the window guide. I'll call these pieces the arms. Since most early cars like this one have the window runner guide directly against the outer skin of the door, it's necessary to fab up a straddle. Another option would be an electronic solenoid, but they tend to be a bit bulky for the thin doors, and you would need to run wires, or use copper contact points with springs at the door jam. (You could possibly pop out your door panel for an arm rest and put the solenoid there.)
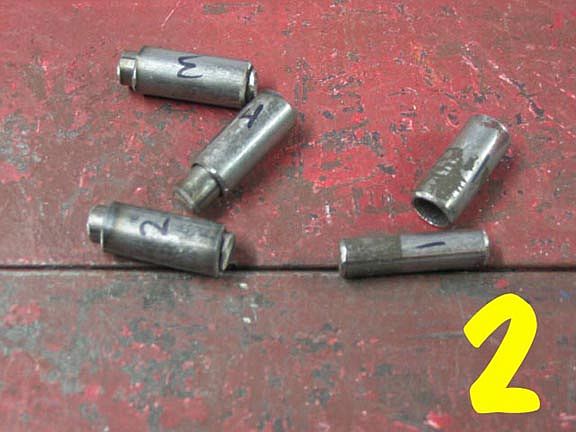
#2 This is the pivot that the arms will be welded to.
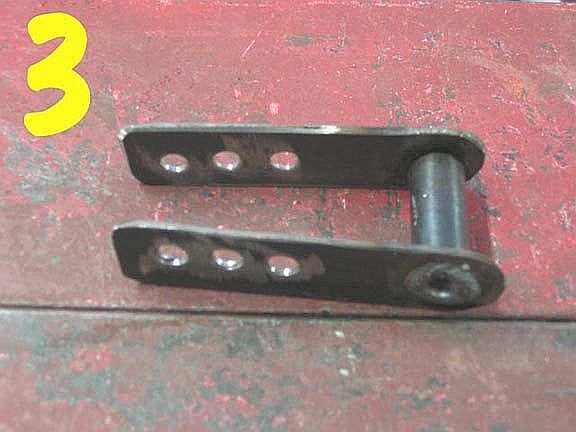
#3 This is the linkage straddle fabbed up. The arms are bent in towards each other to clear the curvature of the outer door skin on the down swing.
#4 This is my original door lock mechanism. Im sure all look very close with some exceptions. The arrow is pointing to the piece I'll be using. This piece faces the outer door skin and the door handle slides into the square opening. The rest gets thrown out.
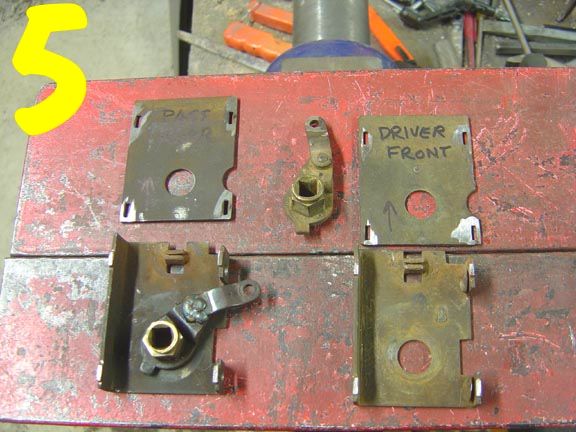
#5 This is the piece cut from #4 and taken apart. I need to do that to weld up the arm that has a pivot point in it.
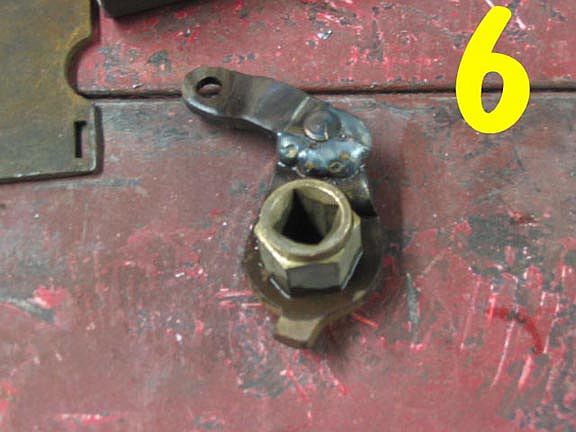
#6 Here's the piece that will accept the door handle all welded in the corect position. Make sure you have the correct side that will face the door outwards, and insert the handle to check that the arm will swing in the correct arc you need before welding. Also check that when the arm is in the up position, the handle is level.
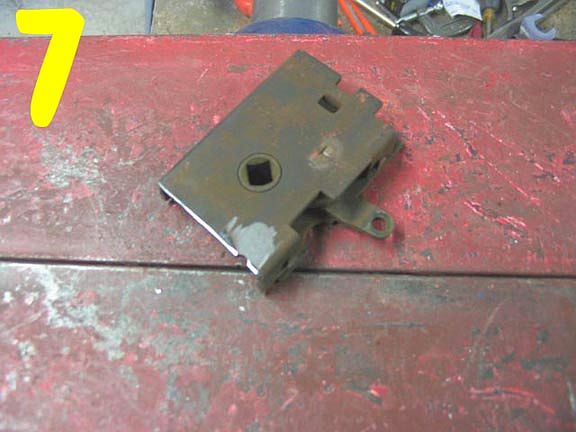
#7 Heres the handle box put back together and welded. The welded arm swings freely and the square opening is aligned so the handle will be level. (in this pic the arm is in the half way point of its swing)
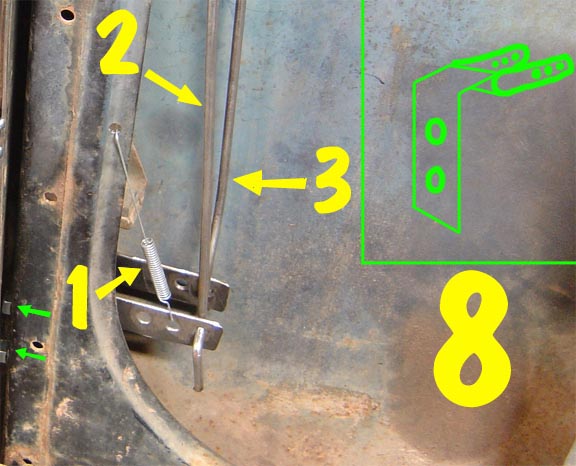
#8 Shape a flat 14 gauge piece of steel into a 'L' (of course I dont have a pic of that). See the green illustration to get an idea. Make it as wide as your door jam and drill two holes in it, vertical to each other. Weld the shorter part of the L to the pivot. The L will be upside down. The longer part of the L will have the holes. In short, this is what will attach the pivot linkage straddle to the inner door jam. You can just make out the bolt heads on the lower left of the pic(green arrows). The (1) is a spring needed to keep the handle level and keep everything tight. The (2) is the linkage going to the latch. The (3) is the linkage going to the handle.
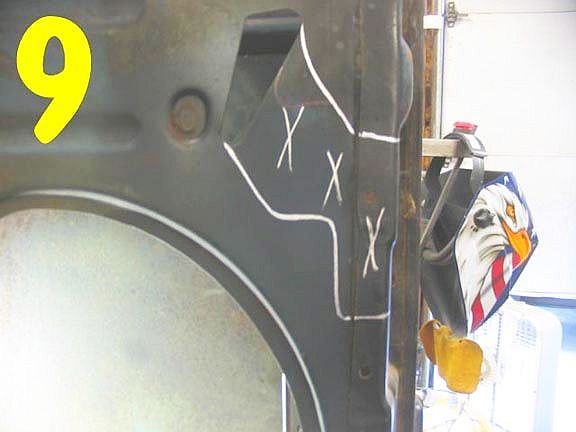
#9 You want to find out where you want the latch. There's really no wrong answer here, except obviously the closer to the middle of the door the better. Measure it on the door jam and on the door panel and check twice. Make sure to account for some room for the arms to swing and linkage space. I use a paint pen in steel, its easier to see, and the tip doesnt dry out like a marker.
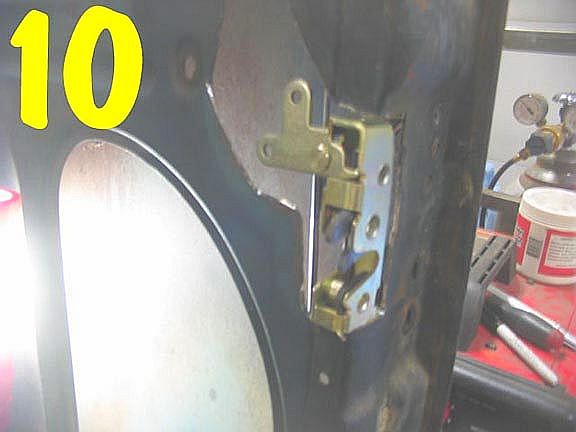
#10 Here the latch is fit in place. Notice the edge of the latch fits the edge of the door. no one part of it hangs out. Thats what you want so that when you weld in the skin, it won't bulge.
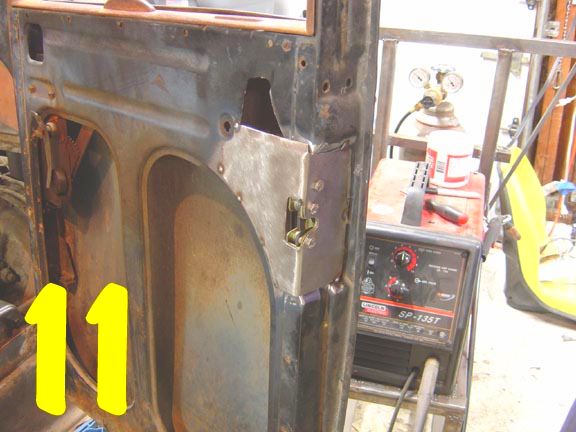
#11 Now, heres the skin installed. Same old trick, use cardboard and make a template. Take some 16 gauge and cut out the contours. Put it in the vice, pound it over with a rubber mallet. Put the latch inside where it'll sit and fit it to the door. Hole punch through the threads and carefully cut out the opening for the strike bolt to mate with the bear claw. Once all that fits nice and you've counter sunk the bolt holes, put it in place once again and make sure the levers on the latch swing free with no rubbing and enough room for linkage. Tack it in place.
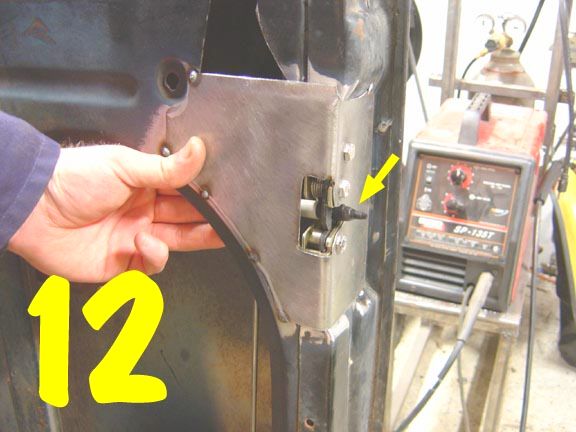
#12 Next, you need to line up the bearclaw to the strike bolt. Easiest way is to put a sharpie through the closed bearclaw with just enough pen poking out. Slowly close the door.
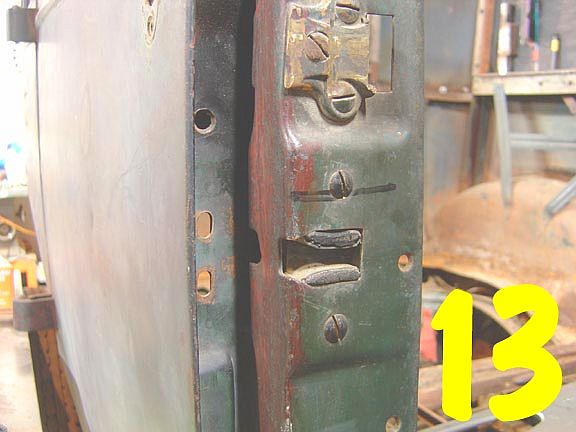
#13 Youll be left with a line that not only tells you vertical location, but where the door stops. Drill that and install the strike bolt with heavy washers. You may need to hog out the hole a bit if it wasnt centered to allow for some adjustment.
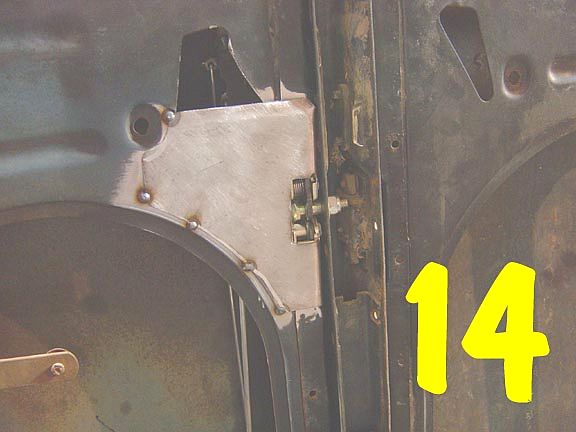
#14 Check the door. you don't want any slop, and you don't want it so tight that there is added stress on the latch. Once you're happy, finish weld and paint. You can see some linkage inside the door and see the door straddling the window runner.
Next I need to box the pillar, but reverse box the strike bolt so that the nuts wont fall down the pillar if I need to remove them. The box will have an inch over hang, so that you wont catch clothes on the bolt and add a finished look as well as added strength to the pillar. I hope this was helpful. It was a really fun project doing all 4. By the time I got to the drivers door, I had it down. And thats recommended too, leave the drivers door for last. Mess up the other doors before you mess up YOUR door! haha Return from Door Latches to Bodywork
|