|
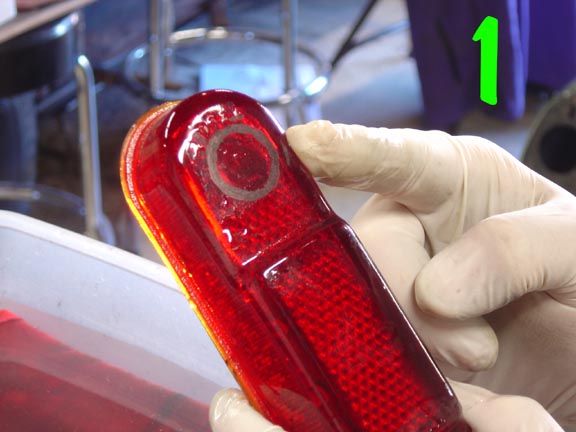
Bluedots: How To Install In THICK Glass Lensesby The Monster So I'm sure everyone on here has installed bluedots, no real reason to post a tech on that, right? However, thick glass can be tricky at times, and I have a few tips I have to maybe help out in some way. #1 clean the glass lenses really good and put on some rubber gloves and a set of safety goggles. Better still a face shield. After all, we're taking about drilling glass... Next, put your chrome ring on the glass. Position it where you want it. Put the lens in the bezel and make sure the dot will look good where it's at. Trace around it nice and thick so you can see it under all the glass powder from drilling.
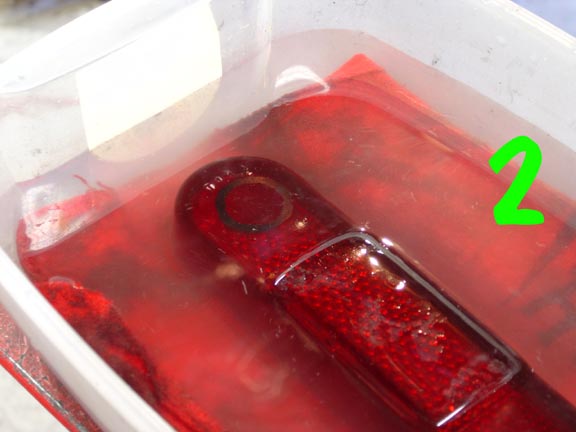
#2 Next, get a plastic tub and fill it with cold water just so that the lens will be completely submerged. Put a shop rag in the bottom. The shop rag keeps the lens from walking around and also hlps a great deal with vibrations, which can lead to a cracked lens. The water helps wash away build up on the bit, it keeps the glass dust from getting airborn, and keeps the glass from overheating. It also clears dust away from your circle outline so you can see your guide.
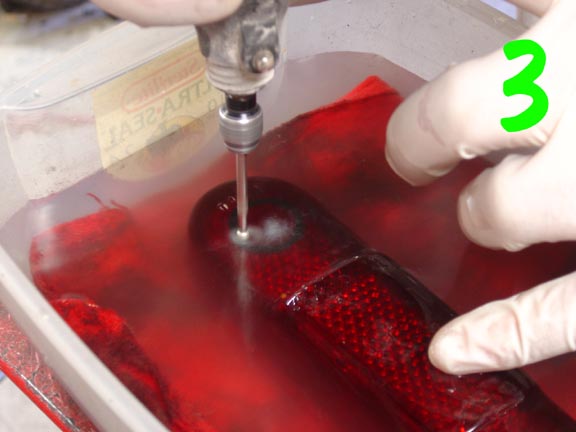
#3 I'm using a Dremel. These are bits made just for glass, you can get them anywhere. I got a set of 30 for 10 bucks. All shapes and sizes. The one you want to use for penetrating the first pilot holes are the round ball tips. Start the bit with the lens slightly out of the water to insure you are where you want to be. Once its seated, submerge it and drill al the way through. Usually, all you need to do is support the dremel side to side. The weight of the tool itself is ample to drill. You do not want to force it or apply much pressure or youll crack even the thickest glass. Glass lenses are old too, and some rare. So take your time, you dont want to have to hunt down those 'special' lenses again.
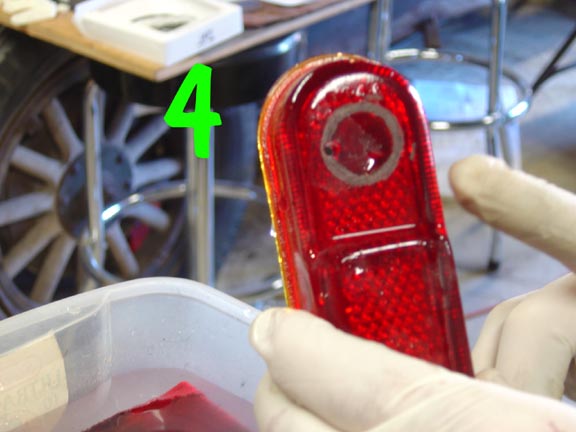
#4 Once you've popped your first hole through, you'll start to get a feel for it. Now, following the outline circle, put holes shoulder to shoulder all the way around. This will save a lot of grinding time and bits.
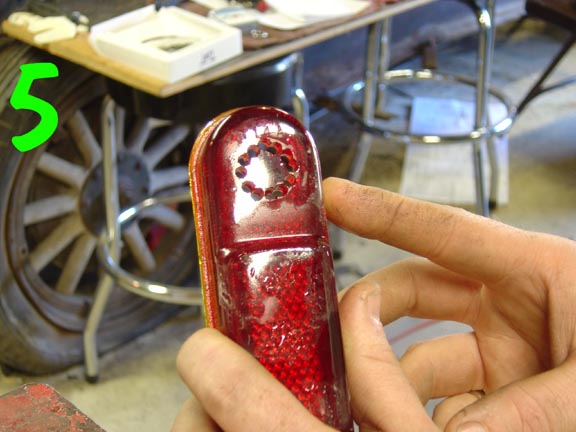
#5 It should look something like this at this stage. Dont worry if the circle of holes doesnt look perfectly round(like this example) You still have a LOT of grinding to do, and itll all work out. Now, I wanted 4 bluedots, so I was in for a sore back! haha
#6 Here is one hole all done. You periodically want to check with your ring to make sure youre getting it close. You obviously dont want to grind away too much. With this step, you want to use the bit that looks like a cylinder.
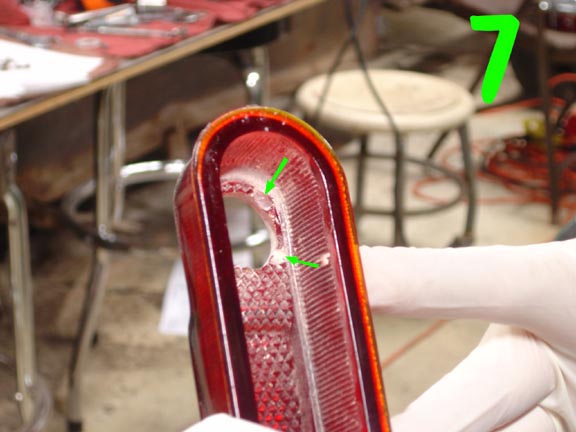
#7 Because the glass is so thick, our chrome ring tabs arent even long enough to twist when installed! So what I did was using the large ball tip bit again, I carefully ground away an area for each tab, allowing room for them to be twisted. (arrows)
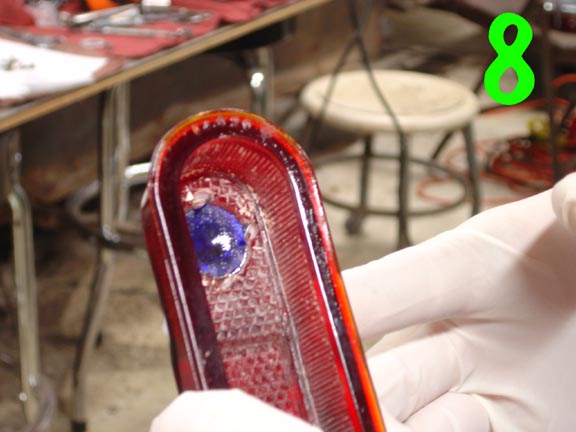
#8 Heres the bluedot installed and the four tabs twisted good to keep it all snug. Some guys run a bead of clear silicone around the ring to try and keep it water tight, but my personal bezels are going to have a drain hole, so I didnt bother.
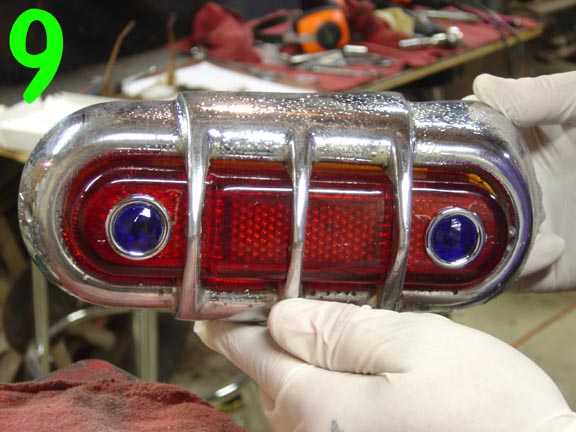
#9 And the finished taillight! 47-49(?) stude commander if Im correct.
Hope some of you can take something from that lesson, I know I've learned alot just trying out new ideas. Have fun! Oh, and just throw the shirt you were wearing right into the wash, you dont want to try and pat out the dust.... bad idea! haha Return from Bluedots to Bodywork
|